
How to Record at Home
- Posted on
- By Tone Stephens
- Posted in interface, microphone, pro audio, recording
- 0
What You'll Need!
Recording at home…where does the whole process begin? Well first, you have to have a song in your head. Whether music is a hobby or a profession for you, having a song in your head is where the desire to record begins. It doesn't matter if the song belongs to you or if you’re wanting to record a cover of a song by your favorite artist.
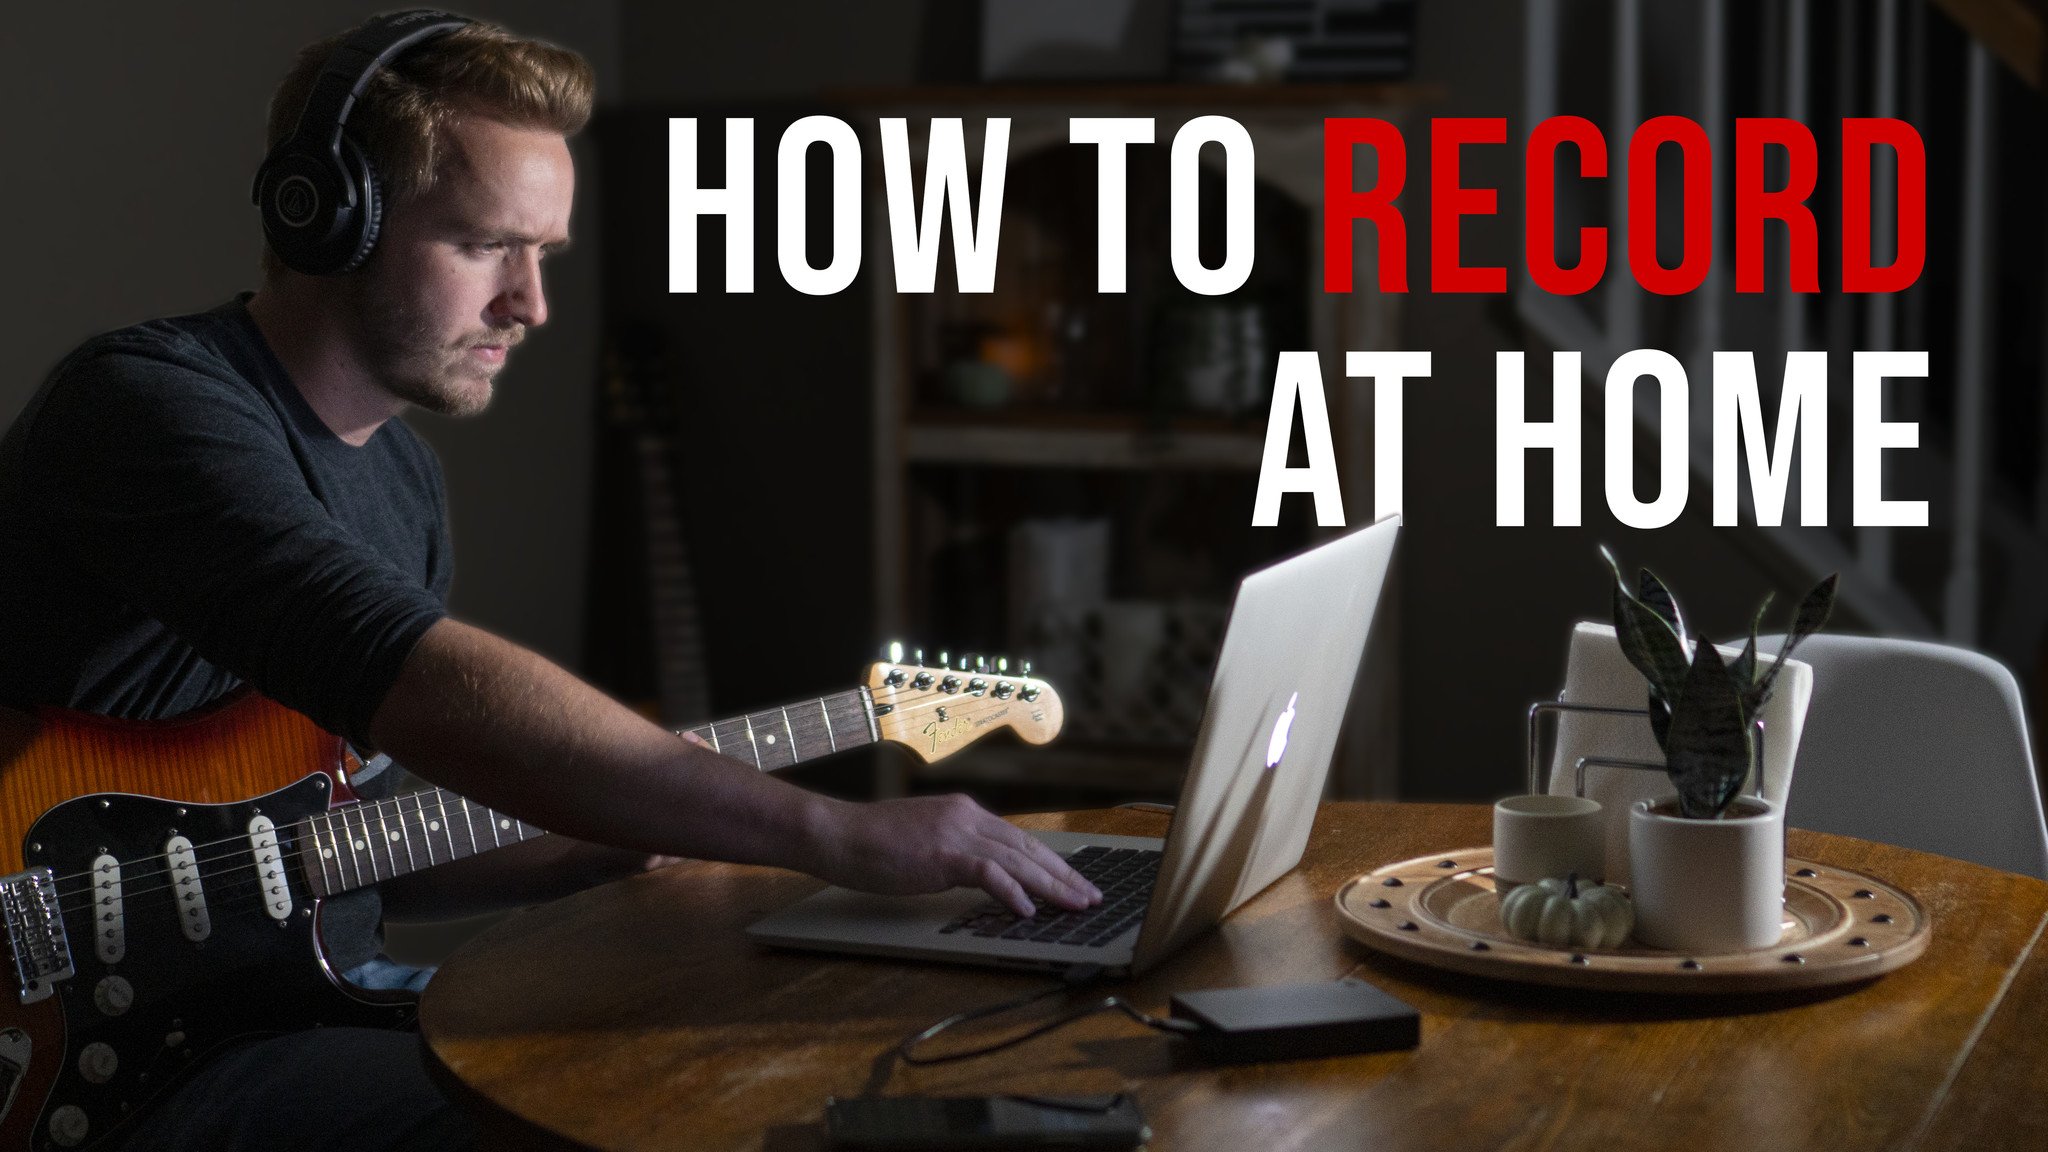
So to start, you have your song or idea for a song, and now you’re ready to record. There are several options that you can use to record; it’s 2020 and technology has made some great advances, so you can use an iPhone, iPad, or a computer! However, for the purposes of this walk-through, we will be using a computer to demonstrate. The next thing you will need, is a recording program most commonly known as a DAW (Digital Audio Workstation). There are a lot of options out there for you to choose, and from the most popular ones are Pro Tools, Ableton, Logic Cubase, Studio One, Reaper, and Garage Band. For our demonstration, we will be using Garage Band.
Next, you will need to purchase a recording interface. The purpose of the recording interface is to give you the ability to plug in your instruments and microphones. These recording interfaces come in various amounts of inputs, which are what you need in order to plug in individual sources. Whether it’s just your voice and a guitar/piano (2-3 inputs), or your whole band (8+ inputs). Multiple inputs on recording interface allow you to record multiple sources simultaneously. (How to choose the right interface.)
So you have your Computer > DAW> Recording Interface, now you will need microphones or instrument cables. Are you recording your voice? Are you recording drums? Guitar Cabinets? The phenomenal thing is that there are microphones designed to capture almost each and every type of source/instrument. The most common types of microphones are: Dynamic and Condenser. (How to choose the right microphone.)
Having a song in your head is a blessing and it’s such a joy to be able to share our voices with others. Fundamentally recording gives others the opportunity to enjoy our music without needing to be present in the environment. It allows us to capture ideas and share them for collaboration with other musicians and songwriters. You can give your recording to your band so they can work on their parts to be better prepared for a rehearsal or performance.
The last thing you will need to begin recording are monitors! Monitors don't have to be the fancy things you see in major recording studios. For example, they can be a set of headphones. Monitors allow you to hear what the sources you're sending through the recording interfaces inputs to the DAW on your computer.
Let’s Record!
Assuming everything is plugged in and ready to go, a great next step is to have an input list that documents what is plugged into each input on your interface. Organization helps take a lot of stress off of the process of recording in the long run.
Step 1 - Prepare Your Recording Session!
Opening your first recording session is a thrill, you're about to embark on the journey of releasing your creativity. These preparation steps are much like the painter choosing their canvas, brushes paints etc.
- First thing after your recording software is open, save your session. If you have a title for the song use that, if not use something you can remember. A common format method for titling your recording is -{YYYYMMDD_Artist_Title_Version}.
- Next, name your Tracks by what source is plugged into the corresponding input.
- Then, set your time signature and tempo.
Step 2 - Setting Up Your Gain Structure!
Gain Structure is a term that’s used to describe the process of optimizing your recording levels for each input. This is so that once you’re finished recording, you can effectively manipulate the raw recorded audio into a more polished shareable product.
- First, if the source you’re recording is plugged in with an instrument cable, make sure the volume of the instrument is turned up at least 75% of the way. If it’s a microphone, move to the following sub-step.
- STOP!!! Does your input need phantom power (48v)? If yes, turn it on, on your interface (mostly required when using condenser microphones)
- Next, on your interface each input will have a “Gain” knob, while playing/singing, adjust the gain knob so that the meters corresponding to each input in your DAW are optimally getting all the green and barely hitting yellow on the meters.
- Next, adjust the volumes of each instrument/Voice so that you're comfortable listening to them in your monitors while you're recording. (Side Note: you should also adjust your headphone volume on your interface during this step.)
Setting up your Gain Structure may take a few test recordings to get it optimized correctly. The biggest things to take into consideration;
- Are your input’s signals loud enough to mix later? (The meter is showing all the green and a little bit of yellow)
- Are your input’s signals peaking? (You don't want this! If the red light at the top of the meter happens while you’re recording, turn the input gain for that source down on your recording interface.)
Step 3 - Printing Your Recording
Printing your recording essentially means the you export your recording so that it can be uploaded or shared. Common file types for sharing your recording are .MP3 and .Wav.
You Just Recorded Your First Song!
Recording your own music is so much fun, whether you're a hobbyist or you aspire to make a career for yourself in the music business. Nile Rodgers (producer, arranger, songwriter, musician, composer) chairman of the Songwriters Hall of Fame said, “I think the hardest thing to overcome is judging yourself and being your own worst critic”. You're just getting started, take each piece of music with a grain of salt, don't over critique, and just keep going. Record, record, record! One of my favorite producers/musicians Quincy Jones said, “You make your mistakes to learn how to get to the good stuff”. My favorite parts about recording are that when you get your creativity out, and it makes room for more. When you record your songs/ideas they are also there for you to come back to. I love going back to old stuff that I created and seeing how far I've grown, and sometimes I will rework those creations from the early beginnings and feel more comfortable sharing.
I’m excited that you took the time to read this article and are now on your journey to recording your music. Please feel free to reach out to me on social media or via email through the links below if you have any questions, or would like to chat more about recording!
Comments
Be the first to comment...